MacBooks are well-known for their great design and wide array of features. With a high-quality display, they are perfect for multimedia and all other tasks.
Many are using Apple products for both video and audio editing, and to get the best results when performing these tasks, you need to have the right hardware.
This is especially true for audio, and to get the best sound quality, you need to have the right hardware and configure your settings properly.
If you’ve never done that before, you’re in luck because today we’ll show you how to change the sound output on Mac M1 Pro with ease.
Is it hard to change Macbook Pro M1 audio output?
If you need to change the sound output on Mac, you can do that easily from the preferences window. The process is simple and it takes only a few clicks.
You can also achieve similar results by using the Volume icon. For detailed instructions on how to do that, be sure to keep on reading.
How can I change audio output on Macbook M1 Pro?
1. Change the Output settings
- Open the Apple menu and select System Preferences.

- Now navigate to Sound.
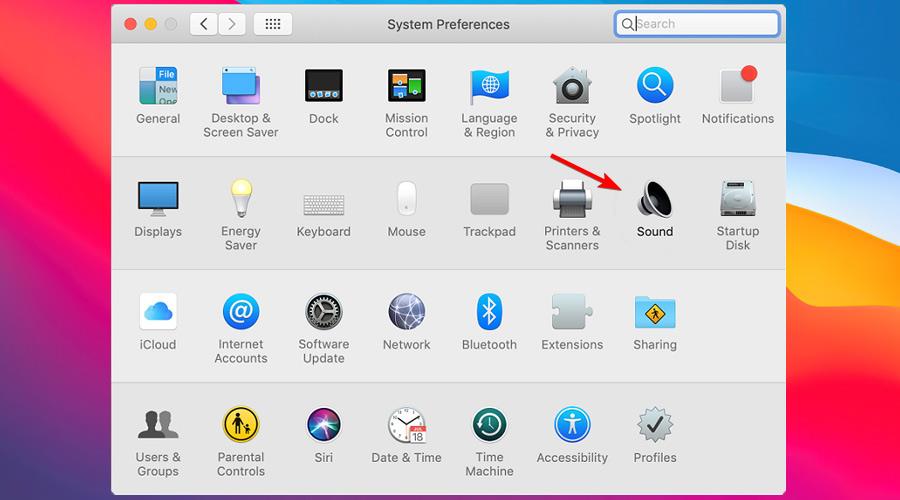
- Select the Output tab.
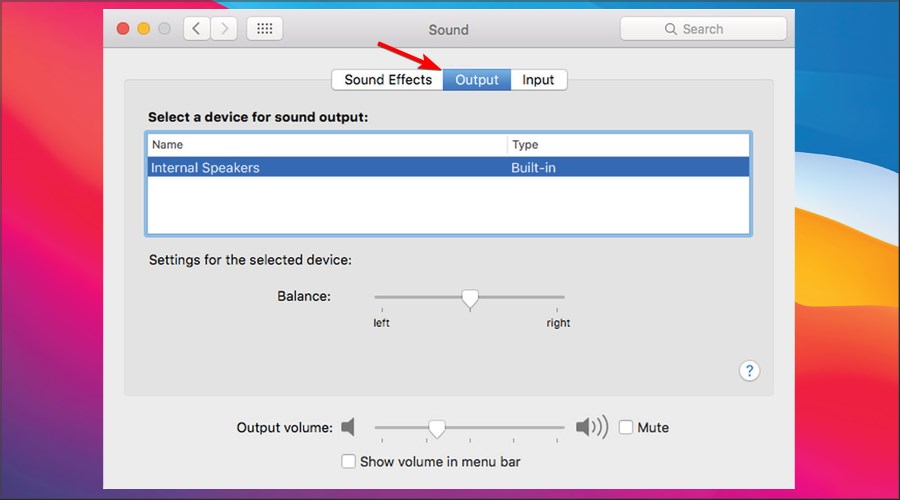
- A list of available output devices will now appear.
- Select the desired device from the list that you want to use for output.
If for some reason Mac won’t let you change the sound output, you can always try the following solution instead.
2. Use the volume icon
- Locate the volume icon in the menu bar.
- Click the Volume icon.
- In the Output Device section choose the desired device.
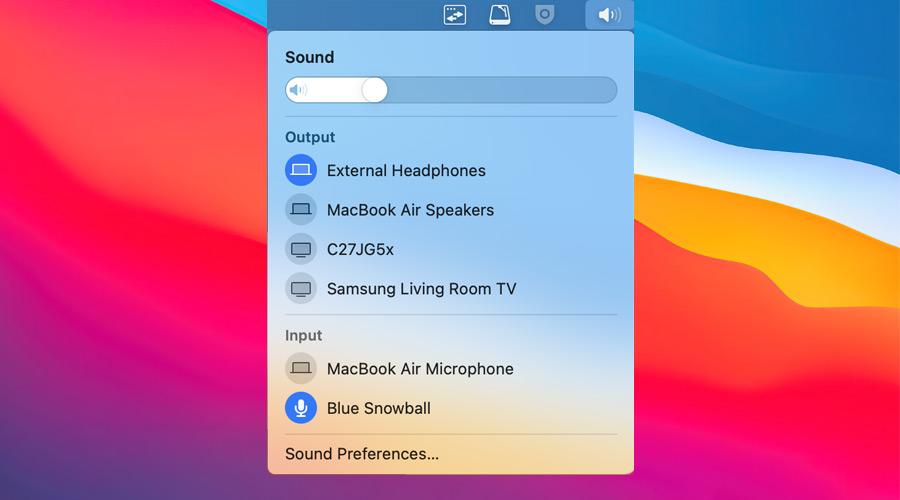
Note: Depending on your settings, the volume icon might not be available in the menu bar.
What are the best Mac Pro M1 Max sound settings to use?
1. Use specialized software
If you want to experience the best sound quality on your Mac, using specialized software such as Boom3D might come in handy.
The software allows you to experience 3D and fully immerse yourself in multimedia, and thanks to the built-in equalizer, you can fine-tune your sound.
You can also boost the volume or adjust the sound level of each available app, so if you want to take your audio to the next level, be sure to give it a try.
2. Disable audio notification when changing volume
- Open the Apple menu and select System Preferences.
- Head over to the Sound section.

- Next, select the Sound Effects tab.
- Disable Play feedback when volume is changed.
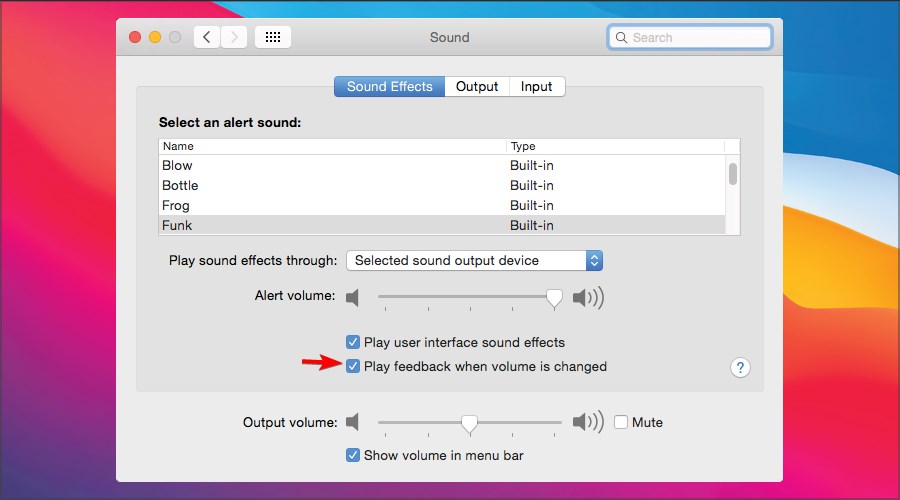
If you don’t want to permanently disable this feature, just press and hold the Shift key while adjusting your volume.
3. Use the keyboard shortcut when adjusting the volume
- Press and hold Option + Shift keys.
- Without releasing the keys, use the volume control keys on the keyboard to adjust the volume.
- By doing so, you’ll get finer control over your volume level.
4. Add a volume icon to the Menu bar
- Open the Apple menu and navigate to System Preferences.
- When the System Preferences window opens, select Sound.

- Now check the Show volume in menu bar checkbox.
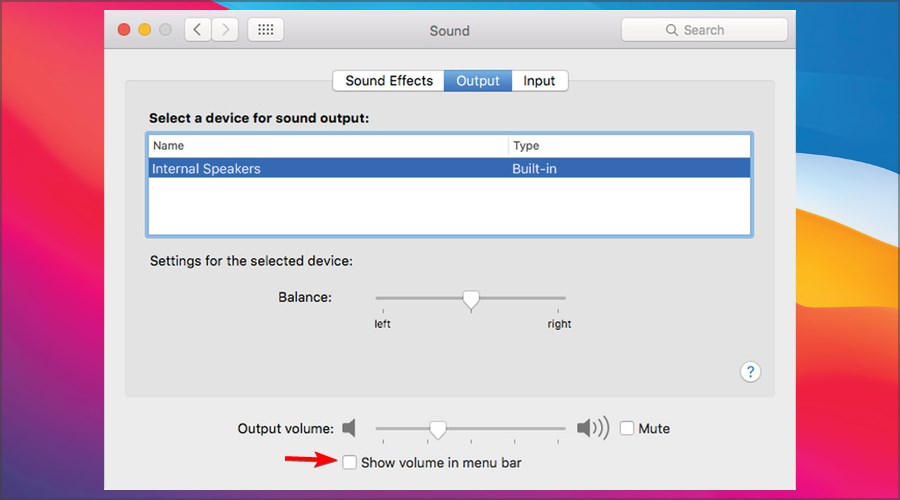
By doing so, you’ll get a volume icon in your menu bar and you’ll be able to quickly configure your input/output device and easily adjust the volume.
Is there a Mac command line to change the sound output?
- Install Xcode from the App Store.

- Open the Applications directory and then navigate to Utilities.
- Run the Terminal.
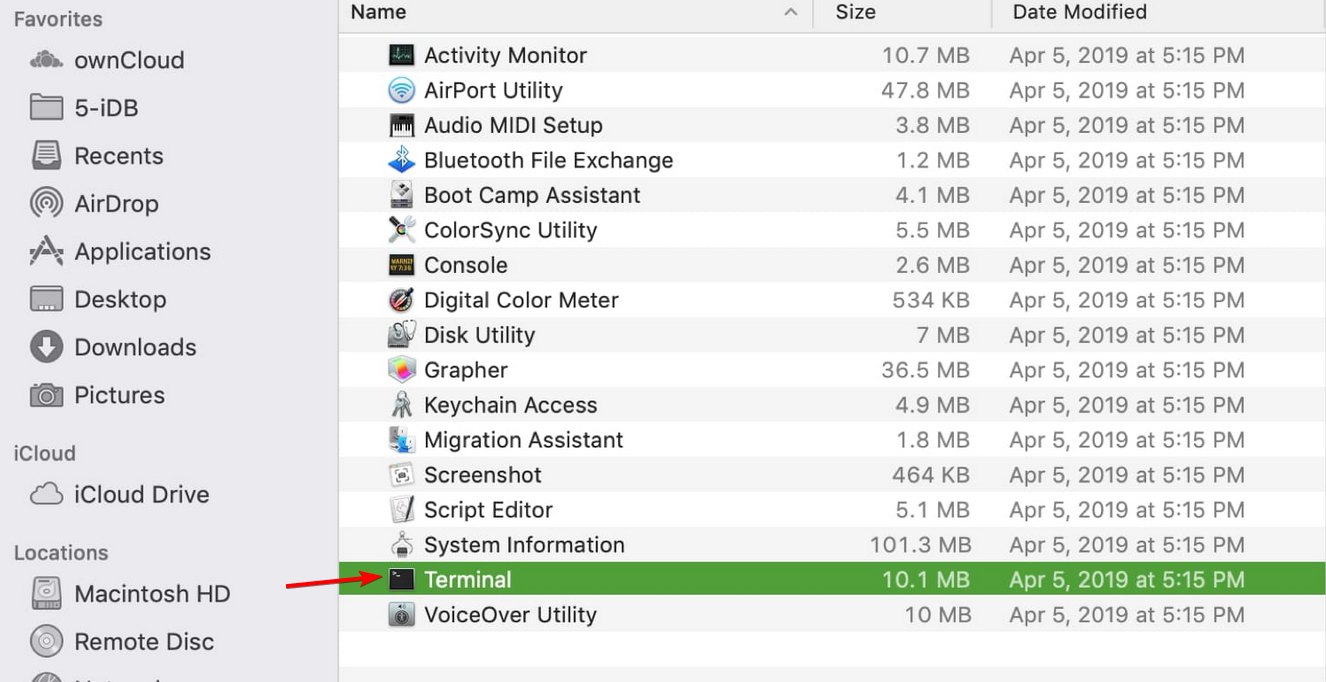
- Run the following commands:
brew install switchaudio-osxSwitchAudioSource [-a] [-c] [-t type] [-n] -s device_name
This is an advanced solution, but if you want to change the sound output on Mac quickly, then it might come in handy.
It’s quite simple to change the sound output on Mac M1 Pro, and we hope that you found this guide useful.
Although there aren’t many sound settings that you can change, selecting the right output device will make a significant difference in sound quality.
This isn’t the only audio issue that users have reported, and many users claim that AirPods are not connecting to Macbook, but that can be easily fixed.
What settings are you using on your Mac? Let us know in the comments section below.

